Hanging leg raise is an excellent abdominal exercise, especially targeting the lower abs. Avoid momentum and control the movement.

Train & diet effectively with the help of the GetFIT App. Our app tracks your calorie intake and workouts, and offers effective plans, recipes, and programs.

(Free trial for new users - cancel anytime)
Our Meal Plans


Blog Articles










Blog Articles

Upper-Body and Core Hypertrophy Workout With Hanging Leg Raises
- Lat Pulldown: 3 sets x 8-12 reps | Rest 2 minutes.
- Chest-Supported Row: 3 sets x 8-12 reps | Rest 2 minutes.
- Incline Dumbbell Bench Press: 3 sets x 8-12 reps | Rest 2 minutes.
- Hanging Leg Raise: 3 sets x 8-15 reps | Rest 90 seconds.
- Cable Crunch: 3 sets x 10-15 reps | Rest 60-90 seconds.
- Cable Lateral Raise: 3 sets x 12-20 reps | Rest 60-90 seconds.
1. Lat Pulldown
Working sets: 3
Repetitions: 8-12
Rest: 2 minutes
Primary muscles: Latissimus dorsi, teres major, and elbow flexors, with assistance from the upper-back muscles.
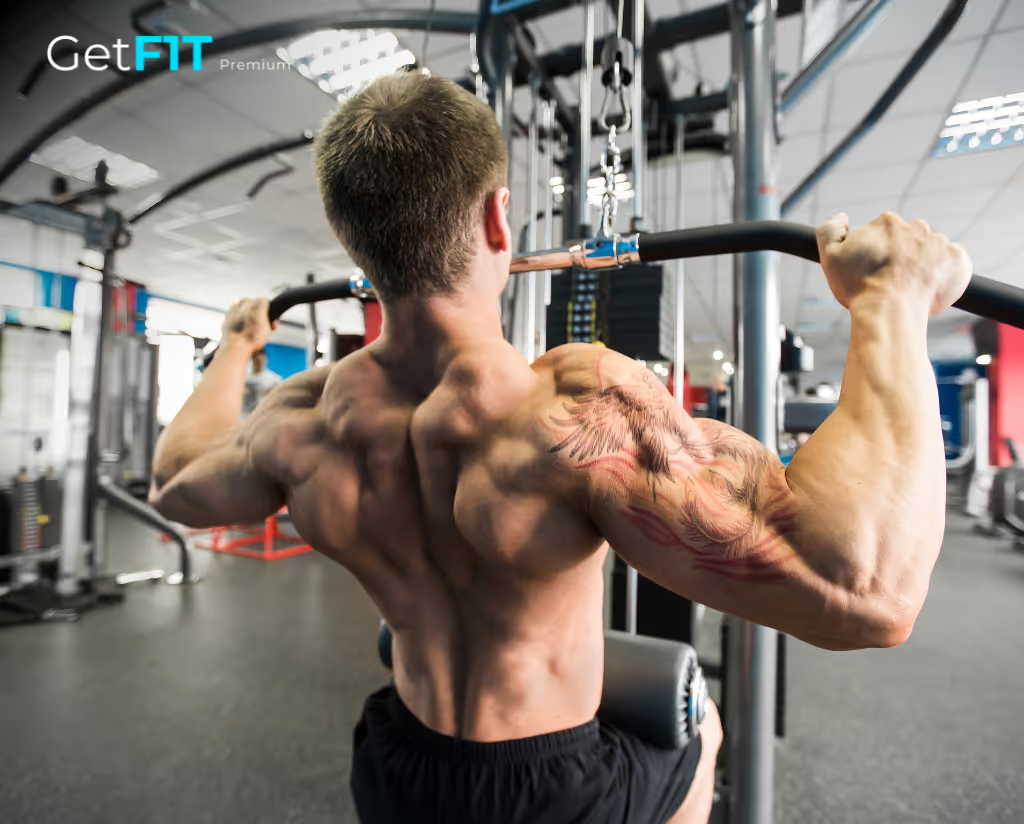
The lat pulldown begins the workout because it is a demanding compound upper-body pulling movement.
Adjust the thigh pad so your lower body remains securely positioned.
Choose a comfortable overhand or neutral grip.
Begin with your arms extended overhead.
Pull the attachment toward your upper chest by moving your elbows downward.
Allow your shoulder blades to move naturally.
Maintain a relatively stable torso without excessive backward swinging.
Return the attachment upward under control.
Select resistance that allows 8-12 repetitions with approximately 1-2 repetitions in reserve.
Avoid pulling the bar behind your neck or using excessive body momentum.
Because the Hanging Leg Raise later requires grip strength, avoid unnecessary forearm fatigue during warm-up sets.
The pulldown provides vertical pulling work before the direct core exercises.
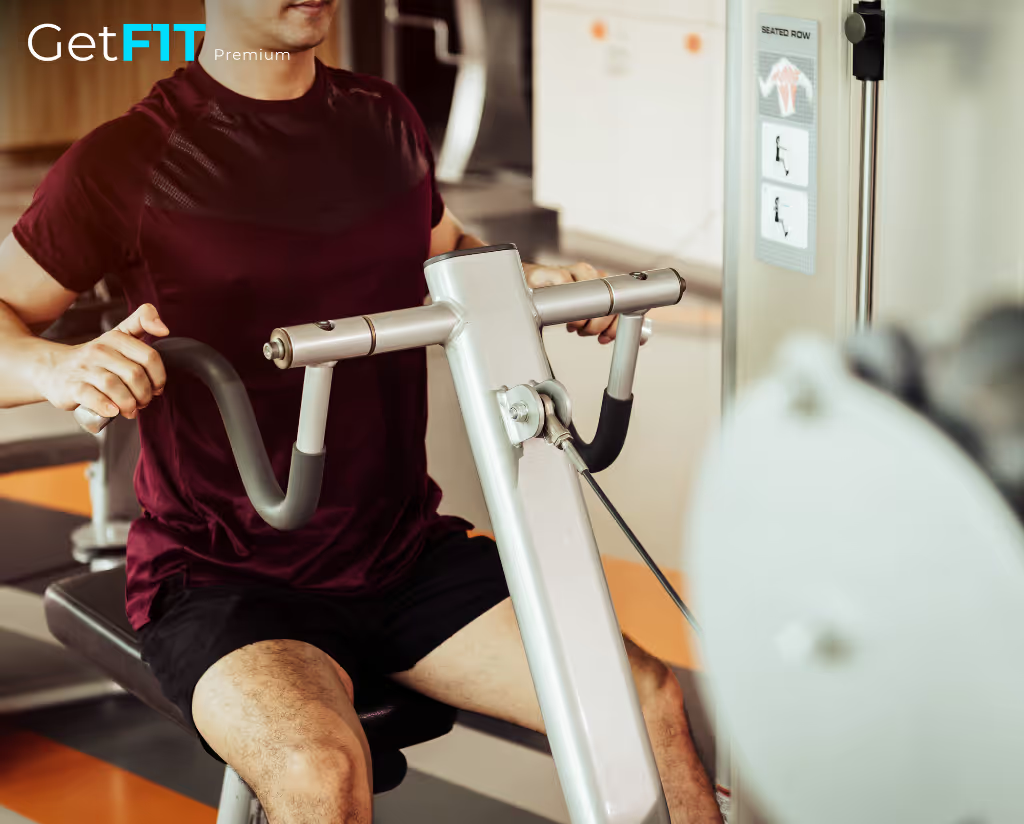
2. Chest-Supported Row
Working sets: 3
Repetitions: 8-12
Rest: 2 minutes
Primary muscles: Latissimus dorsi, trapezius, rhomboids, posterior deltoids, and elbow flexors.
The chest-supported row provides horizontal pulling while reducing some unsupported torso stabilization demands.
Adjust the machine or incline bench so your chest remains firmly supported.
Begin with your arms extended toward the resistance.
Pull the handles toward your torso while moving your elbows backward.
Allow your shoulder blades to retract naturally.
Pause briefly near the top if useful.
Lower gradually without allowing the resistance to pull your shoulders abruptly forward.
Choose a load that allows 8-12 controlled repetitions with approximately 1-2 repetitions in reserve.
Avoid lifting your chest from the support or using sudden momentum.
The chest-supported position allows substantial back training without requiring the same spinal erector endurance as bent-over barbell rows.
This helps manage fatigue before the subsequent abdominal exercises.
3. Incline Dumbbell Bench Press
Working sets: 3
Repetitions: 8-12
Rest: 2 minutes
Primary muscles: Pectoralis major, particularly its clavicular region, with assistance from the anterior deltoids and triceps.
The incline dumbbell bench press adds compound pushing work to the upper-body session.
Set an adjustable bench to approximately 15-30 degrees.
Sit with the dumbbells securely supported near your thighs before positioning them beside your upper chest.
Maintain stable feet and comfortable wrist alignment.
Press the dumbbells upward through a controlled arc.
Allow your elbows to follow a natural path.
Lower gradually toward a comfortable chest stretch.
Choose resistance that leaves approximately 1-2 repetitions in reserve.
Avoid excessively flaring the elbows, bouncing at the bottom, or lifting your hips from the bench.
Because the exercise is performed before direct abdominal work, torso stability should not yet be significantly affected by core fatigue.
Maintain the same bench angle when tracking strength progression.
4. Hanging Leg Raise
Working sets: 3
Repetitions: 8-15
Rest: 90 seconds
Primary muscles: Rectus abdominis and hip flexors, with assistance from the obliques, forearms, and shoulder stabilizers.
The Hanging Leg Raise is the main bodyweight abdominal movement in this workout.
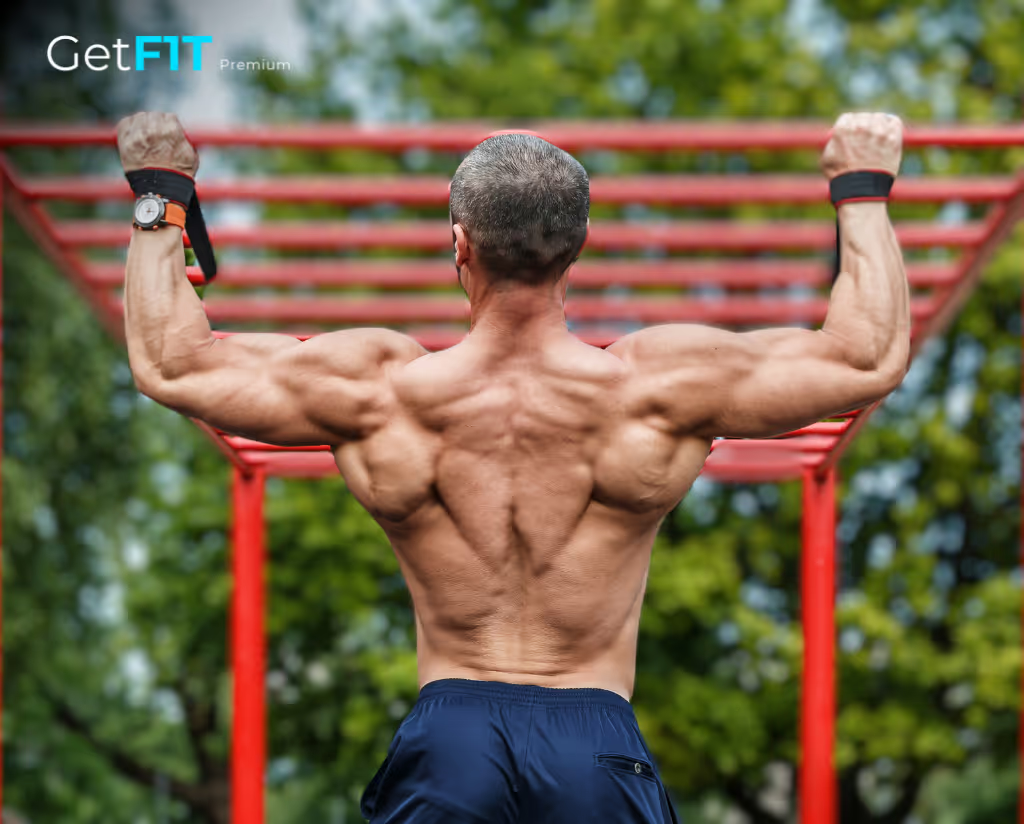
Grip a secure pull-up bar with your hands approximately shoulder-width apart.
Establish a stable hanging position.
Maintain comfortable shoulder engagement and light abdominal tension.
Raise your legs by flexing the hips.
When your thighs approach your torso, deliberately curl your pelvis upward toward your rib cage.
Pause briefly near the highest controlled position.
Lower your legs gradually without allowing your body to swing.
Choose a knee position that allows approximately 1-2 repetitions in reserve.
Beginners can perform hanging knee raises.
More experienced lifters can use straighter legs when the pelvic movement remains controlled.
Avoid kicking upward, dropping the legs, or extending the lower back excessively.
Because the pulldowns and rows have already challenged your grip, stop if hand fatigue prevents safe hanging.
If grip becomes the limiting factor, substitute a captain's chair leg raise or supported reverse crunch.
Record whether you performed bent-knee or straight-leg repetitions, because these variations differ in difficulty.
5. Cable Crunch
Working sets: 3
Repetitions: 10-15
Rest: 60-90 seconds
Primary muscles: Rectus abdominis, with assistance from the obliques.
The cable crunch provides additional direct abdominal training using adjustable external resistance.
Attach a rope to a high cable pulley.
Kneel at a comfortable distance from the machine.
Hold the rope near the sides of your head without pulling aggressively through your arms.
Begin with your torso reasonably extended and your pelvis stable.
Curl your rib cage toward your pelvis through controlled spinal flexion.
Avoid turning the movement into a hip hinge.
Pause briefly near the contracted position if useful.
Return gradually into a comfortable starting range.
Choose resistance that allows 10-15 repetitions with approximately 1-2 repetitions in reserve.
Avoid jerking the rope downward or using the arms as the primary force producers.
The cable crunch complements Hanging Leg Raises by providing adjustable resistance for trunk flexion.
This makes it useful for tracking direct abdominal strength and hypertrophy progression.
6. Cable Lateral Raise
Working sets: 3
Repetitions: 12-20
Rest: 60-90 seconds
Primary muscles: Lateral deltoids, with assistance from the supraspinatus and shoulder blade stabilizers.
The cable lateral raise finishes the workout with direct shoulder-abduction training.
Set a cable pulley near the bottom of the machine.
Stand sideways to the pulley and hold the handle with one hand.
Maintain a stable stance and a small elbow bend.
Raise your arm outward through a comfortable arc.
Continue toward approximately shoulder height.
Lower gradually without swinging your torso.
Choose resistance that allows 12-20 repetitions with approximately 1-2 repetitions in reserve.
Avoid using heavy resistance that requires shrugging or body momentum.
Perform the prescribed sets for both shoulders.
This adds lateral deltoid work without requiring another compound pressing movement.
If your grip remains fatigued from the hanging exercise, use an appropriate cable cuff attachment or a supported lateral raise machine.
How to Warm Up Before This Hanging Leg Raise Workout
Begin with approximately 5-10 minutes of general preparation, followed by movement-specific warm-up sets.
Start with 3-5 minutes of light walking, cycling, or another comfortable activity.
Then perform controlled upper-body and trunk movements such as:
- Gentle shoulder circles.
- Comfortable overhead arm raises.
- Light scapular movements.
- Bodyweight pelvic tilts.
- A few controlled reverse crunches.
- Brief comfortable hangs from a secure pull-up bar.
Before lat pulldowns, gradually increase resistance.
For example, if your intended working resistance is 50 kg:
- 20 kg x 10 controlled repetitions.
- 30 kg x 6 repetitions.
- 40 kg x 3 repetitions.
- Begin working sets at 50 kg.
These are example loads rather than mandatory percentages.
Before Hanging Leg Raises, complete approximately 5-8 easy hanging knee raises to confirm shoulder comfort, grip security, and pelvic movement.
Do not exhaust your grip during preparation.
For cable crunches, perform a light set to establish the rope position and resistance.
The warm-up should prepare the relevant muscles without significantly reducing working-set performance.
How Hard Should You Train During This Upper-Body and Core Workout?
Most working sets should finish relatively close to muscular failure while preserving consistent technique.
Repetitions in reserve (RIR) describes how many additional technically sound repetitions you estimate you could complete before muscular failure.
Use these practical effort targets:
- Lat Pulldown: Approximately 1-2 RIR without excessive torso swinging.
- Chest-Supported Row: Approximately 1-2 RIR with stable chest contact.
- Incline Dumbbell Bench Press: Approximately 1-2 RIR while maintaining controlled pressing.
- Hanging Leg Raise: Approximately 1-2 RIR before pelvic control or hanging stability deteriorates.
- Cable Crunch: Approximately 1-2 RIR with controlled trunk flexion.
- Cable Lateral Raise: Approximately 1-2 RIR without torso momentum.
For compound movements, maintain enough technical control to prevent excessive compensation.
For Hanging Leg Raises, technical failure is particularly important.
If you can no longer curl your pelvis upward and begin swinging your legs instead, the intended abdominal movement has deteriorated.
That is a practical point to end the set.
For cable crunches, do not continue repetitions by pulling harder with your arms.
Machine and cable isolation exercises can often be trained close to muscular failure, but every set does not need to reach absolute failure.
The goal is challenging, repeatable muscular work rather than completing additional repetitions through momentum.
How to Progress This Hanging Leg Raise Workout Over Several Weeks
Use double progression for the resistance exercises and controlled movement progression for Hanging Leg Raises.
Weeks 1-2: Establish your baseline.
Select weights that allow controlled repetitions near the lower end of the prescribed ranges.
For Hanging Leg Raises, choose the hardest variation that allows approximately eight controlled repetitions with deliberate pelvic movement.
For some lifters, this will be a hanging knee raise.
For others, it will be a straight-leg raise.
Record the variation and completed repetitions.
Weeks 3-4: Increase repetitions.
Maintain the same exercise difficulty while gradually increasing repetitions.
For example:
- Week 1: 10, 9, and 8 hanging knee raises.
- Week 2: 11, 10, and 9 repetitions.
- Week 3: 12, 11, and 10 repetitions.
- Week 4: 12, 12, and 12 repetitions.
Only count repetitions completed without significant swinging or loss of pelvic control.
For weighted exercises, work toward the upper end of each repetition range.
Weeks 5-6: Increase difficulty when ready.
Once all Hanging Leg Raise sets reach the upper repetition target with the intended RIR, increase difficulty.
This may involve:
- Gradually extending the knees.
- Increasing the comfortable range.
- Adding a controlled top pause.
- Using light external resistance when appropriate.
After increasing difficulty, repetitions may return closer to eight.
Continue progressing from there.
For cable crunches, increase weight only when all sets reach fifteen controlled repetitions.
For pulldowns, rows, and incline presses, increase resistance after reaching the upper repetition target without changes in technique.
For lateral raises, avoid using a heavier weight that forces swinging.
If performance declines across several workouts, review accumulated fatigue.
Temporarily reducing accessory sets or training farther from failure may help restore consistent performance.
Progress should reflect improved strength and movement control under comparable conditions.
How to Fit This Hanging Leg Raise Workout Into a Four-to-Six-Day Training Split
This workout can serve as an upper-body and core session within a four-to-six-day resistance training routine.
For a four-day upper/lower split, use it as one upper-body session while distributing additional pressing and arm work across the second upper-body day.
For a five- or six-day routine, it can serve as an upper-body session with dedicated abdominal work.
The workout includes three vertical pulling sets, three horizontal rowing sets, and three incline pressing sets.
Hanging Leg Raises and cable crunches provide six direct abdominal sets using different movement patterns.
Cable lateral raises contribute three direct lateral deltoid sets.
Because the abdominal muscles also stabilize the torso during squats, deadlifts, and overhead presses, consider this overlap when organizing weekly training.
However, indirect stabilization does not necessarily replace challenging direct abdominal work when hypertrophy is a specific objective.
A practical approach is to train the abdominal muscles two or three times weekly through approximately four to eight initial direct working sets, adjusting according to training experience, progress, and recovery.
This session already provides six direct abdominal sets.
Therefore, a second core session may only require a smaller amount of additional work.
You do not need to repeat six demanding abdominal sets every day.
Also consider grip and shoulder fatigue.
Hanging Leg Raises performed immediately after a very demanding pull workout may become limited by exhausted forearms.
If that occurs, move the exercise earlier, reduce hanging volume, or use a supported abdominal variation.
When practical, allow adequate recovery between demanding sessions involving the same muscle groups, often around 48 hours or more depending on total workload.
If abdominal repetitions and resistance improve while soreness and fatigue remain manageable, maintain the current volume.
If grip fatigue, hip-flexor discomfort, or declining performance develops, reduce overlapping sets or substitute an exercise that better targets the intended muscles.
The priority is consistent abdominal progression through controlled pelvic movement, complementary resistance-based trunk training, and a recoverable weekly workload.
What Is the Hanging Leg Raise and Is It Effective for Building Abs?
The Hanging Leg Raise is a bodyweight exercise that trains the abdominal muscles and hip flexors while your body hangs from a pull-up bar. It involves raising your legs toward your torso, controlling your pelvic position, and lowering them without excessive swinging.
The exercise is commonly included in core workouts because it challenges the abdominal muscles through movement while requiring the upper body to support your weight.
A hanging leg raise combines hip flexion with trunk and pelvic control.
During the first portion of the movement, the hip flexors raise the thighs toward the torso.
When you deliberately curl your pelvis upward, the rectus abdominis contributes dynamically through posterior pelvic tilt and spinal flexion.
This distinction is important because simply raising straight legs without moving the pelvis can place considerable emphasis on the hip flexors.
For abdominal hypertrophy, the goal is not just to lift your feet higher. It is to control the pelvis and create meaningful abdominal tension.
The Hanging Leg Raise can be effective for building abdominal muscle when performed through a productive range, sufficiently close to muscular failure, and progressed over time.
It is particularly useful for people who want a challenging bodyweight core exercise without requiring a dedicated abdominal machine.
However, the movement also demands grip strength, shoulder stability, and control of the hanging position.
These requirements may limit performance before the abdominal muscles become sufficiently fatigued.
For beginners, hanging knee raises or supported reverse crunches are often easier starting points.
Hanging Leg Raises are not mandatory for visible abdominal definition. Resistance training can develop the abdominal muscles, while overall body fat levels influence how visible those muscles appear.
For people who can maintain a controlled hang and avoid excessive momentum, the exercise is a practical addition to an upper-body or dedicated core training session.
What Are the Main Benefits of Hanging Leg Raises?
Hanging Leg Raises provide challenging abdominal and hip-flexor training while developing control of the pelvis in a suspended position.
Their main benefits include:
- Abdominal muscle development: The rectus abdominis contributes to posterior pelvic tilt and controlled trunk flexion.
- Hip-flexor strength: The iliopsoas and other hip flexors help raise the thighs toward the torso.
- Progressive bodyweight training: Difficulty can increase through straighter knees, a larger range, and additional resistance.
- Pelvic control: The movement requires deliberate coordination between the abdominal muscles and hips.
- Grip endurance: The forearms and hand muscles support bodyweight throughout the set.
- Shoulder stabilization: The shoulder girdle helps maintain the hanging position.
- Minimal equipment: A secure pull-up bar is sufficient for the conventional variation.
- Workout flexibility: The exercise can be included after pull workouts, upper-body sessions, or lower-body training.
One distinguishing advantage is the ability to train controlled pelvic movement while the legs create resistance.
As the legs move farther from the body's center of mass, the exercise generally becomes more demanding.
This explains why straight-leg raises are typically harder than bent-knee raises.
However, increased difficulty does not automatically mean greater abdominal loading if the pelvis remains stationary.
For example, someone may raise straight legs to hip height using mostly hip flexion while performing relatively little dynamic abdominal movement.
A controlled hanging knee raise that finishes with the pelvis curling upward may provide a more useful abdominal stimulus.
The exercise is most productive when the movement matches the intended training goal rather than when the lifter simply achieves the highest possible foot position.
What Muscles Does the Hanging Leg Raise Work?
The Hanging Leg Raise primarily trains the hip flexors and rectus abdominis, with contributions from the obliques, forearm muscles, and shoulder stabilizers.
The exact muscular emphasis depends on knee position, pelvic movement, range of motion, and body control.
Rectus Abdominis
The rectus abdominis is the long abdominal muscle running vertically along the front of the torso.
It contributes to spinal flexion, posterior pelvic tilt, and control of the relationship between the rib cage and pelvis.
During Hanging Leg Raises, the rectus abdominis performs two important functions.
First, it helps stabilize the pelvis and trunk against the forces created by the raised legs.
Second, when the pelvis curls upward toward the rib cage, it actively contributes to the movement.
This second component is especially relevant for abdominal training.
If the pelvis remains relatively stationary while the thighs rise, the hip flexors perform much of the dynamic movement.
To increase abdominal involvement, think about bringing your pelvis toward your lower ribs near the top rather than simply lifting your feet.
The rectus abdominis is one continuous muscle, not separate upper and lower muscles.
Although different exercises can create different regional demands, Hanging Leg Raises do not completely isolate the lower abs.
They train the abdominal wall through a movement pattern that often emphasizes pelvic control.
Iliopsoas and Other Hip Flexors
The iliopsoas consists of the psoas major and iliacus.
These muscles are major contributors to hip flexion.
During Hanging Leg Raises, they help lift the thighs toward the torso.
Other muscles involved include:
- Rectus femoris: Contributes to hip flexion and knee extension.
- Sartorius: Assists with hip flexion and other hip movements.
- Tensor fasciae latae: Assists with hip flexion and stabilization.
The hip flexors become particularly important during straight-leg variations.
Keeping the knees extended increases the resistance demands compared with a bent-knee position.
However, stronger hip flexion does not necessarily indicate greater abdominal muscle loading.
For core-focused training, combine the upward leg movement with deliberate pelvic rotation.
Hip-flexor fatigue is normal during Hanging Leg Raises, but it should not consistently prevent the abdominal muscles from receiving challenging work.
If that happens, use a bent-knee variation or supported reverse crunch.
Internal and External Obliques
The internal and external obliques help stabilize the trunk and pelvis during Hanging Leg Raises.
They contribute to abdominal compression, pelvic control, and resisting unwanted torso rotation.
During standard bilateral leg raises, they work alongside the rectus abdominis.
Their stabilization role becomes more demanding if the body begins rotating from side to side.
During twisting knee raises, the obliques contribute more directly to controlled rotational movement.
However, deliberately swinging the legs sideways does not provide the same muscular stimulus as controlled trunk rotation.
For targeted oblique hypertrophy, cable crunch variations, controlled rotational exercises, and side-bending movements may provide more straightforward resistance progression.
Forearm Muscles and Grip
The forearm flexors and hand muscles maintain your grip on the pull-up bar.
Because the entire body hangs from the hands, grip endurance can become a limiting factor.
The longer each set lasts, the greater the sustained demand on the forearms.
This can be useful for developing hanging endurance.
However, it also creates a limitation for abdominal hypertrophy.
If your hands fatigue after five repetitions while your abdominal muscles could perform several more, grip strength is restricting the intended core training.
Potential solutions include:
- Using a comfortable, secure grip.
- Improving grip endurance separately.
- Using appropriate hanging straps when suitable.
- Performing supported captain's chair knee raises.
- Choosing a floor-based abdominal exercise.
The best solution depends on whether abdominal development or hanging strength is the primary goal.
Shoulder and Scapular Stabilizers
The shoulders and upper-back muscles help maintain a controlled hanging position.
Relevant contributors include the rotator cuff, latissimus dorsi, trapezius, and other muscles involved in shoulder and scapular control.
Their role depends on whether you use a relaxed passive hang or a more active supported hanging position.
For most controlled Hanging Leg Raises, a comfortable active hang with some shoulder engagement is practical.
This can help reduce uncontrolled body swinging.
However, you do not need to force an exaggerated shoulder depression throughout every repetition.
The shoulder position should remain comfortable and stable.
These muscles mainly support the exercise rather than producing the primary leg-raising movement.
How to Set Up the Hanging Leg Raise Correctly
A proper setup requires a secure pull-up bar, sufficient floor clearance, and a hanging position that feels comfortable around the shoulders.
Step 1: Choose a stable pull-up bar.
Use a bar that is securely installed and appropriate for supporting your bodyweight.
Avoid unstable door frames or improvised equipment.
Step 2: Check the available clearance.
You should have enough space to hang without your feet repeatedly striking the floor.
Also make sure there is adequate clearance in front of your body for the upward leg movement.
Step 3: Choose your grip.
Begin with an overhand grip approximately shoulder-width apart.
A neutral grip may be comfortable if the equipment provides suitable handles.
Step 4: Establish your hanging position.
Hang with your arms extended through a comfortable range.
Keep your torso relatively stable.
Step 5: Engage your shoulders naturally.
Maintain enough shoulder and upper-back tension to control your body without excessive shrugging or rigid positioning.
Step 6: Position your pelvis.
Begin with a relatively neutral pelvic position, then lightly engage the abdominal muscles.
Avoid exaggerating your lower-back arch.
Step 7: Select your knee position.
Beginners should start with bent knees.
More experienced lifters can use straighter legs if the movement remains controlled.
Step 8: Test your control.
Perform a small controlled knee raise to confirm that you can lift and lower without substantial swinging.
If the hanging position becomes uncomfortable before the working muscles are challenged, choose a supported variation.
How to Perform the Hanging Leg Raise Step by Step
The Hanging Leg Raise should be performed by raising the legs under control, curling the pelvis upward when possible, and lowering without swinging.
- Grip the pull-up bar securely. Use a comfortable overhand or neutral grip.
- Establish a stable hang. Keep your shoulders controlled and avoid unnecessary body movement.
- Brace your abdomen. Maintain a comfortable rib cage and pelvic position.
- Begin lifting your legs. Flex your hips to raise the thighs forward.
- Maintain your chosen knee position. Keep the legs straight or slightly bent according to your strength.
- Continue toward hip height. Avoid throwing your legs upward with momentum.
- Curl your pelvis upward. Bring your pelvis toward your rib cage to involve the abdominal muscles dynamically.
- Pause briefly near the top. Maintain control without excessively swinging backward.
- Lower your legs gradually. Reverse the movement while resisting excessive lower-back arching.
- Return to the starting position. Allow the legs to lower without using momentum to begin another repetition.
The most important coaching cue is to finish the movement with controlled pelvic rotation.
For example, think about curling your tailbone upward rather than trying to touch your toes to the bar.
Your legs create resistance, but the abdominal muscles help produce the pelvic movement.
If you cannot maintain control with straight legs, bend your knees.
A controlled hanging knee raise is more productive than a straight-leg variation performed almost entirely through swinging.
End the set when the next repetition would require significant momentum or loss of pelvic control.
How High Should You Raise Your Legs?
Raise your legs as high as you can while maintaining control of the pelvis and avoiding excessive swinging.
A common starting objective is to bring the thighs toward approximately horizontal.
However, reaching hip height through hip flexion does not necessarily create substantial dynamic abdominal movement.
To emphasize the abdominal muscles, continue by curling your pelvis upward.
This may raise the knees or feet higher without requiring the hips alone to perform the entire movement.
A useful sequence is:
- Begin from a stable hang.
- Raise the thighs forward.
- Allow the hips to flex.
- Curl the pelvis upward.
- Briefly control the top position.
- Lower without swinging.
The exact height depends on your strength, mobility, and chosen variation.
You do not need to perform toes-to-bar repetitions to build abdominal muscle.
Likewise, repeatedly throwing the feet above the head does not automatically provide a better hypertrophy stimulus.
Controlled pelvic movement matters more than reaching an arbitrary foot height.
Should You Keep Your Legs Straight or Bend Your Knees?
Both straight-leg and bent-knee Hanging Leg Raises can train the abdominal muscles, but straight legs create a more demanding lever.
When your knees remain extended, more of your lower-limb mass is positioned farther from the hips.
This increases the resistance demands during leg raising.
A bent-knee position shortens the lever and generally makes the exercise easier.
Bent-knee raises are useful when:
- You are learning the hanging position.
- Grip endurance is limited.
- You struggle to control body swinging.
- You want to emphasize posterior pelvic tilt.
- Straight-leg repetitions cause excessive hip-flexor fatigue.
Straight-leg raises are useful when:
- You can already perform controlled hanging knee raises.
- Your grip and shoulders tolerate longer sets.
- You can raise the legs without substantial momentum.
- You maintain deliberate pelvic control.
- You want a more challenging bodyweight progression.
A partially bent-knee position is also acceptable.
The knees do not need to remain perfectly locked.
Progress toward straighter legs only when the abdominal movement remains controlled.
How Do You Perform Hanging Leg Raises Without Swinging?
To prevent swinging during Hanging Leg Raises, use a stable starting position, controlled hip flexion, and a deliberate lowering phase.
Swinging often begins when the legs drop too quickly.
The body then moves backward and forward, creating momentum that can assist the next repetition.
This reduces consistency and makes it harder to determine how much work the abdominal muscles are performing.
Use these corrections:
- Begin each set from a motionless hang.
- Raise your legs without kicking.
- Keep your shoulders reasonably stable.
- Curl your pelvis upward instead of throwing your feet.
- Lower over approximately two or three seconds.
- Allow any remaining movement to settle before repeating.
- Reduce difficulty when necessary.
If straight-leg raises produce repeated swinging, switch to hanging knee raises.
If the body continues moving excessively, perform fewer repetitions per set and reset between them.
A small amount of natural movement is not automatically a problem.
The objective is to avoid relying on deliberate momentum as the main source of movement.
How Important Is Posterior Pelvic Tilt During Hanging Leg Raises?
Posterior pelvic tilt is particularly useful when the goal is to train the rectus abdominis dynamically.
Posterior pelvic tilt means rotating the pelvis so the tailbone moves forward and upward relative to the torso.
During a Hanging Leg Raise, this action helps bring the pelvis toward the rib cage.
The rectus abdominis contributes to producing this movement.
Without substantial pelvic rotation, the exercise may function primarily as a hip-flexion movement.
The hip flexors raise the thighs while the abdominal muscles stabilize the pelvis.
Both actions have training value, but they are not identical.
To practice posterior pelvic tilt:
- Begin with bent knees.
- Raise the thighs toward your torso.
- Imagine curling your pelvis upward.
- Bring the knees slightly closer to your chest without swinging.
- Lower gradually.
Avoid forcing the lower back into extreme spinal flexion.
A controlled pelvic curl through a comfortable range is sufficient.
If you cannot produce this movement while hanging, reverse crunches can help you practice the same abdominal action with less grip and shoulder demand.
What Is the Best Breathing Technique for Hanging Leg Raises?
Exhale during the leg raise and pelvic curl, then inhale while lowering your legs under control.
A practical breathing sequence is:
- Starting position: Take a comfortable breath and establish abdominal tension.
- Upward phase: Exhale as you raise your legs and curl the pelvis.
- Top position: Briefly maintain abdominal control.
- Lowering phase: Inhale gradually as you return.
- Between repetitions: Reset without losing control of the hanging position.
Exhaling during the pelvic curl can make it easier to maintain abdominal tension.
However, breathing should not be forced or exaggerated.
Avoid holding your breath throughout long sets.
For most bodyweight core training, steady breathing is practical.
If you find yourself repeatedly holding your breath to compensate for excessive difficulty, switch to a bent-knee variation or reduce repetitions.
What Range of Motion and Tempo Should You Use?
A productive Hanging Leg Raise involves a controlled upward movement, deliberate pelvic action, and a gradual return toward the starting position.
A practical tempo is:
- Raising phase: Approximately 1-2 seconds.
- Top position: Optional one-second pause.
- Lowering phase: Approximately 2-3 seconds.
- Bottom position: Brief reset to prevent swinging.
These timings are guidelines rather than rigid requirements.
The main objective is to maintain tension rather than repeatedly bouncing between positions.
The range of motion should be large enough to challenge the abdominal muscles without forcing uncomfortable hip or spinal positions.
At the bottom, allow your legs to lower comfortably.
At the top, emphasize a controlled pelvic curl.
If the full range creates excessive swinging, use a shorter controlled range temporarily and progress as strength improves.
Avoid performing only shallow leg movements when you can safely achieve a more productive range.
What Are the Most Common Hanging Leg Raise Mistakes?
The most common mistakes involve excessive swinging, relying only on hip flexion, and choosing a variation that exceeds current strength.
Using momentum: Swinging the legs forward makes repetitions easier to complete without equivalent muscular control. Begin from a stable hang and lower gradually.
Ignoring pelvic movement: Raising the thighs without curling the pelvis can emphasize the hip flexors. Add a controlled posterior pelvic tilt near the top.
Using straight legs too early: An excessively difficult lever can cause poor technique. Begin with bent knees and progress gradually.
Dropping the legs: Rapid lowering creates swinging and reduces control. Use a deliberate eccentric phase.
Arching the lower back excessively: Uncontrolled lumbar extension can reduce pelvic stability. Maintain abdominal tension and avoid letting the legs pull the pelvis into an exaggerated arch.
Pulling with the arms: Excessive elbow bending can turn the movement into an awkward combination of hanging and pulling. Keep the arms relatively stable.
Shrugging or forcing the shoulders: An uncomfortable hanging position may limit the set. Use a natural, controlled shoulder position.
Performing partial repetitions unintentionally: Progressively shorter raises make performance difficult to compare. Maintain a consistent range.
Using excessive ankle weights: Additional resistance may increase swinging before the abdominal muscles receive productive work. Master bodyweight control first.
Continuing after grip failure: If the hands are slipping, finish the set safely rather than attempting uncontrolled repetitions.
Hanging Leg Raise Variations for Beginners and Advanced Lifters
Hanging Leg Raises can be modified by changing knee position, body support, resistance, and pelvic movement.
Beginner: Lying Reverse Crunch
Lie on your back with your hips and knees bent.
Curl your pelvis toward your rib cage to lift your hips slightly from the floor.
This removes hanging and grip demands while practicing abdominal-driven pelvic movement.
Beginner: Captain's Chair Knee Raise
Support your forearms on a vertical knee raise station.
Raise your knees toward your torso and curl your pelvis upward.
This reduces grip requirements and can be useful before progressing to a pull-up bar.
Beginner: Hanging Knee Raise
Hang from a secure bar with your knees bent.
Raise your thighs toward your torso and add a controlled pelvic curl.
The shorter lever makes this easier than a straight-leg raise.
Intermediate: Straight-Leg Hanging Raise
Keep your legs relatively straight throughout the movement.
Raise them without swinging and finish with controlled pelvic movement.
This increases the lever demands compared with bent-knee raises.
Intermediate: Paused Hanging Leg Raise
Pause for approximately one second near the highest controlled position.
This reduces reliance on momentum and reinforces abdominal control.
Intermediate: Slow Eccentric Hanging Leg Raise
Raise your legs normally, then lower over three to four seconds.
This increases the demands of the return phase but may reduce the number of repetitions you can complete.
Advanced: Toes-to-Bar
Raise your feet toward the bar using controlled hip flexion and trunk movement.
A strict toes-to-bar requires substantial strength, mobility, and hanging control.
It is not necessary for abdominal hypertrophy.
Advanced: Weighted Hanging Knee Raise
Use light ankle weights or another secure resistance method.
Maintain a controlled pelvic curl and avoid swinging.
Additional weight is only useful when bodyweight repetitions are already consistent.
Advanced: Hanging Oblique Knee Raise
Raise your knees while producing a controlled amount of pelvic rotation.
This introduces additional oblique demands.
Avoid throwing the legs sideways or rotating through momentum.
Drop sets can be performed by transitioning from strict straight-leg raises to controlled bent-knee raises after fatigue develops.
However, this is optional. Conventional straight sets are sufficient for effective core training.
What Are the Best Alternatives to Hanging Leg Raises?
Several exercises train the abdominal muscles and hip flexors without requiring the same hanging position.
Hanging Knee Raise: A simpler bodyweight progression using bent knees. It trains the hip flexors and abdominals with a shorter lever.
Captain's Chair Leg Raise: Uses forearm support to reduce grip demands while training hip flexion and pelvic control.
Reverse Crunch: A floor-based abdominal exercise emphasizing posterior pelvic tilt. It is useful when hanging equipment is unavailable.
Cable Crunch: A loaded spinal-flexion exercise that trains the rectus abdominis with adjustable resistance. It can be easier to progress precisely than bodyweight leg raises.
Machine Abdominal Crunch: A guided trunk-flexion exercise providing stable resistance and adjustable loading. Useful for direct abdominal hypertrophy.
Decline Reverse Crunch: A reverse crunch performed on a decline bench, changing the resistance demands and body angle.
Dead Bug: A floor-based trunk-control exercise involving alternating arm and leg movement. It is generally less suitable for heavy abdominal loading but useful for practicing pelvic stability.
Ab Wheel Rollout: A demanding anti-extension exercise that challenges the abdominal muscles while the arms move away from the torso. It differs substantially from dynamic pelvic curling.
Lying Leg Raise: A floor-based hip-flexion exercise that may include pelvic control. Raising the legs alone does not necessarily create substantial dynamic abdominal flexion.
Weighted Decline Crunch: A trunk-flexion exercise that can be progressively loaded with a weight plate or dumbbell.
For direct abdominal hypertrophy, cable crunches, reverse crunches, and controlled hanging variations are all practical options.
Choose the movement that challenges the abdominal muscles without grip or balance limitations preventing productive sets.
Hanging Leg Raise vs. Hanging Knee Raise: Which Is Better?
Both exercises train the hip flexors and abdominal muscles, but the knee raise generally has a shorter lever and lower resistance demands.
During a Hanging Knee Raise, the knees remain bent.
This places more of the leg mass closer to the hips.
During a straight-leg raise, the legs remain extended, increasing the lever demands.
A straight-leg raise is therefore typically more difficult.
However, greater difficulty does not automatically mean better abdominal hypertrophy.
If someone can perform ten controlled knee raises with clear pelvic curling but only four swinging straight-leg repetitions, knee raises may provide more productive abdominal training.
Choose knee raises when learning pelvic control.
Progress to straighter legs when you can maintain the same movement quality.
Both variations can remain useful throughout a training program.
Hanging Leg Raise vs. Reverse Crunch: Which Builds Better Abs?
Both Hanging Leg Raises and reverse crunches can train the rectus abdominis through posterior pelvic tilt.
The main difference is the body position and additional muscular demands.
Hanging Leg Raises require grip strength, shoulder support, and hip flexion against the resistance created by the legs.
Reverse crunches support the torso on the floor or bench, removing most hanging-related limitations.
For someone whose grip fails early, reverse crunches may provide more direct abdominal training.
For someone who can maintain a controlled hang, Hanging Leg Raises provide a challenging bodyweight progression.
Neither movement guarantees greater abdominal hypertrophy.
The quality of pelvic movement, resistance, training effort, and progression matter more than whether the body is hanging or lying down.
Hanging Leg Raise vs. Cable Crunch: Which Is Better for Ab Hypertrophy?
Hanging Leg Raises and cable crunches challenge the abdominal muscles through different movement patterns.
Cable crunches primarily involve trunk flexion against adjustable cable resistance.
Hanging Leg Raises involve hip flexion alongside abdominal stabilization and posterior pelvic movement.
Cable crunches often make progressive resistance easier to measure because the weight stack can increase in small increments.
Hanging Leg Raises require progression through lever length, movement range, repetitions, or additional resistance.
For straightforward abdominal hypertrophy programming, cable crunches can be particularly convenient.
For bodyweight core training with additional hanging demands, Hanging Leg Raises are useful.
Both can be included in the same program, although excessive overlapping abdominal volume is unnecessary.
Do Hanging Leg Raises Work the Lower Abs?
Hanging Leg Raises train the rectus abdominis, including the portion located below the navel, but they do not completely isolate separate lower abdominal muscles.
The rectus abdominis is one continuous paired muscle.
Its different regions may experience different mechanical demands during particular movements.
During a Hanging Leg Raise, posterior pelvic tilt is especially relevant because it involves bringing the pelvis toward the rib cage.
This can create substantial abdominal muscle involvement.
However, simply lifting the legs through hip flexion does not guarantee strong dynamic rectus abdominis loading.
To emphasize abdominal training:
- Raise the thighs under control.
- Curl the pelvis upward near the top.
- Avoid swinging.
- Lower gradually.
- Select a variation that allows enough challenging repetitions.
Visible lower abdominal definition also depends on overall body fat levels.
No abdominal exercise selectively removes fat from the lower stomach.
Can Hanging Leg Raises Build Abs Without Weights?
Yes, Hanging Leg Raises can build abdominal muscle without external weights when the movement provides sufficient resistance and challenging training effort.
Bodyweight resistance is not automatically too light for hypertrophy.
The exercise can be demanding because the abdominal muscles must control the pelvis against forces generated by the raised legs.
However, the training stimulus depends on the variation.
A controlled straight-leg raise can be substantially harder than a bent-knee raise.
Progression options include:
- Increasing controlled repetitions.
- Improving pelvic movement.
- Using a larger comfortable range.
- Straightening the knees gradually.
- Adding a brief pause.
- Using additional resistance when appropriate.
If you can perform many repetitions without significant abdominal fatigue, a harder variation or adjustable-resistance exercise may be more useful.
Weighted cable crunches are one practical option for continued progression.
How Many Sets and Reps of Hanging Leg Raises Should You Do?
Hanging Leg Raises are generally best programmed with controlled moderate-repetition sets rather than maximal-speed repetitions.
For abdominal muscle growth:
- 2-4 working sets.
- 8-15 controlled repetitions.
- 60-120 seconds of rest.
- Approximately 1-3 repetitions in reserve.
For core strength:
- 3-4 working sets.
- 5-10 challenging repetitions.
- 90-150 seconds of rest.
- Maintain strict pelvic control.
For muscular endurance:
- 2-3 working sets.
- 15-20 controlled repetitions.
- 45-90 seconds of rest.
- Stop when swinging or technique deterioration begins.
Repetitions in reserve, or RIR, means the estimated number of additional technically sound repetitions you could complete before muscular failure.
For Hanging Leg Raises, technical failure may occur before absolute muscular failure.
For example, you might still be able to swing your legs upward but no longer perform a strict pelvic curl.
End the working set when you cannot maintain the intended abdominal movement.
Choose an easier variation if you cannot complete approximately five controlled repetitions.
If you can perform more than fifteen consistently, consider a harder variation rather than increasing repetitions indefinitely.
Should You Do Hanging Leg Raises Before or After Your Workout?
Hanging Leg Raises generally fit well after the main compound exercises in an upper-body or lower-body workout.
They challenge the abdominal muscles, grip, and shoulder stabilizers.
Performing demanding hanging sets before heavy squats, deadlifts, or pull-ups may reduce performance if those supporting muscles become fatigued.
A practical workout order is:
- Primary compound exercise.
- Secondary compound exercise.
- Accessory strength exercises.
- Hanging Leg Raise.
- Additional core work if needed.
However, if abdominal training is your main priority, Hanging Leg Raises can be performed earlier.
For example, a dedicated core session can begin with strict hanging raises before cable crunches.
Consider grip fatigue when combining the exercise with pull-ups, rows, and heavy deadlifts.
If your hands are already exhausted, a captain's chair or reverse crunch may provide more effective abdominal work that day.
How to Progress Hanging Leg Raises Over Time
Progressive overload for Hanging Leg Raises involves increasing controlled repetitions, movement difficulty, or external resistance while maintaining pelvic control.
Double progression can be applied to a consistent variation.
Example: 3 sets of 8-12 strict Hanging Knee Raises
Week 1:
- Set 1: 10 repetitions.
- Set 2: 9 repetitions.
- Set 3: 8 repetitions.
Week 2:
- Set 1: 11 repetitions.
- Set 2: 10 repetitions.
- Set 3: 9 repetitions.
Week 3:
- Set 1: 12 repetitions.
- Set 2: 11 repetitions.
- Set 3: 10 repetitions.
Week 4:
- Set 1: 12 repetitions.
- Set 2: 12 repetitions.
- Set 3: 12 repetitions.
Once all three sets reach twelve controlled repetitions with the intended RIR, progress to a slightly more demanding version.
For example, extend the knees farther during each repetition.
Repetitions may initially return closer to eight.
Continue progressing gradually.
When full straight-leg repetitions become consistent, small amounts of additional resistance can be introduced if appropriate.
However, do not increase difficulty by introducing substantial swinging or abandoning pelvic rotation.
Record the variation, repetitions, range, and control.
A set of ten strict hanging knee raises is not directly equivalent to ten swinging straight-leg raises.
Adding another working set may be appropriate if weekly abdominal volume and recovery support it.
If progress stalls, repeat the same variation and improve movement consistency before increasing difficulty.
How Often Should You Train Hanging Leg Raises?
Most lifters can train Hanging Leg Raises approximately two or three times per week, depending on overall core workload and recovery.
For example:
- First upper-body session: 3 sets of 8-12 repetitions.
- Second lower-body session: 2 sets of 10-15 repetitions.
- Optional third session: Another abdominal exercise using a different movement pattern.
The abdominal muscles also contribute to trunk stabilization during squats, deadlifts, overhead presses, and other compound exercises.
However, this stabilization work does not necessarily replace direct abdominal training when hypertrophy is the priority.
Hanging Leg Raises create additional demands on the grip and shoulders.
If these muscles remain fatigued from pulling workouts, adjust exercise placement or use supported core training.
You do not need to perform Hanging Leg Raises every day.
Consistent challenging sets and progressive movement quality are more important than maximum frequency.
Practical Coaching Tips for Better Hanging Leg Raises
- Start with bent knees: Master the abdominal movement before attempting straight-leg raises.
- Control your pelvis: Finish repetitions by curling the tailbone upward.
- Avoid swinging: Allow your body to settle before beginning the next repetition.
- Lower gradually: The downward phase should not create momentum for the next repetition.
- Use a secure grip: Stop when your hands can no longer support your weight safely.
- Maintain comfortable shoulder positioning: Avoid forcing an exaggerated hanging posture.
- Prioritize quality over height: Raising your feet higher is not useful if pelvic control deteriorates.
- Use enough range: Avoid shallow repetitions when a larger controlled movement is possible.
- Track the variation: Bent-knee and straight-leg repetitions are not equivalent.
- Use support when needed: Captain's chair raises can reduce grip limitations.
- Avoid excessive resistance: Ankle weights should only be added after bodyweight technique is consistent.
- Combine movement patterns: Cable crunches can provide complementary adjustable abdominal resistance.
Are Hanging Leg Raises Safe for Your Lower Back, Hips, and Shoulders?
Hanging Leg Raises can be a comfortable and effective exercise when the hanging position, movement difficulty, and range match your abilities.
Potential sources of discomfort include:
- Excessive swinging.
- Poor grip security.
- Forcing the legs into an uncomfortable range.
- Uncontrolled lower-back extension.
- Excessive hip-flexor strain.
- Shoulder discomfort during hanging.
- Sudden lowering movements.
- Using resistance beyond your current control.
- Continuing repetitions after significant technique deterioration.
A normal working set may produce abdominal fatigue, hip-flexor effort, and forearm tiredness.
However, sharp pain in the lower back, hips, or shoulders should not be treated as normal muscular effort.
If the hips become uncomfortable, reduce the leg-raising range or use bent knees.
If the shoulders cannot tolerate hanging, use a captain's chair or floor-based reverse crunch.
If the lower back arches excessively, reduce difficulty and emphasize controlled pelvic movement.
Persistent pain, numbness, or radiating symptoms warrant assessment by a qualified healthcare professional.
The goal is to challenge the abdominal muscles through controlled pelvic movement without allowing grip fatigue, shoulder discomfort, or momentum to dictate the exercise.

More Exercises
All Exercises









Everything You Need for a Fitter Body is here in GetFIT App!
Set calorie and macro goals, track your meals and activity, follow structured workout and meal plans, and monitor your progress over time. GetFIT App brings nutrition tracking, fitness planning, and everyday tools together in one simple membership.
High-Protein Recipes & Meal Plans
Discover hundreds of high-protein recipes, ready-made 4 week meal plans, and healthy meal ideas for weight loss and muscle building. Every recipe includes clear calorie and macro information, so eating for your goals is simple.



Join Thousands of GetFIT App Users Worldwide
Thousands of people around the world have already joined GetFIT App to track their nutrition, follow workout programs, and work toward their fitness goals. Join our growing global community and get the tools you need to manage your fitness journey in one place.

Try GetFIT App for 5 days free!
Discover the premium features of the GetFIT App during a free trial: personalized calorie calculation and tracking, meal plans, recipes, workout programs, e-books, and much more. Start your transformation today!

Dear User! Unlock your Dream Body Today!
Start your free trial today! With your premium membership, you’ll get immediate access to all the tools and content that help you lose weight, build muscle, and develop a healthy lifestyle.