Seated leg press is a safe way to build lower-body strength with heavy weights. Maintain lower back stability and proper foot placement.

Train & diet effectively with the help of the GetFIT App. Our app tracks your calorie intake and workouts, and offers effective plans, recipes, and programs.

(Free trial for new users - cancel anytime)
Our Meal Plans


Blog Articles








Blog Articles
Quad-Focused Leg Workout With Seated Leg Press
- Seated Leg Press: 3 sets × 10–15 reps, rest 2–3 minutes.
- Bulgarian Split Squat: 3 sets × 8–12 reps per leg, rest 90–120 seconds.
- Seated Leg Extension: 3 sets × 12–15 reps, rest 60–90 seconds.
- Seated Leg Curl: 3 sets × 10–15 reps, rest 60–90 seconds.
- Standing Calf Raise: 3 sets × 10–15 reps, rest 60–90 seconds.
1. Seated Leg Press: 3 × 10–15
The seated leg press is the primary quadriceps-focused compound exercise in this workout.
Performing it first allows you to train the quadriceps and hip extensors with challenging resistance before fatigue accumulates from the other exercises.
How to perform it:
- Adjust the seat so your hips and knees can bend comfortably.
- Place your feet approximately shoulder-width apart.
- Keep your back and pelvis supported.
- Push the platform away by extending your knees and hips.
- Avoid forcefully locking your knees.
- Lower the platform gradually to a comfortable depth.
Training tips:
- Maintain full-foot contact.
- Keep your knees tracking naturally.
- Avoid lifting your pelvis off the seat.
- Use a consistent range of motion.
- Maintain approximately 1–2 repetitions in reserve.
Rest 2–3 minutes between working sets.
2. Bulgarian Split Squat: 3 × 8–12 Per Leg
The Bulgarian split squat provides unilateral quadriceps and glute training.
It complements the seated leg press by requiring greater balance and independent leg control.
How to perform it:
- Stand in front of a bench with one foot positioned behind you.
- Place the top of your rear foot on the bench.
- Position your front foot far enough forward to allow comfortable knee and hip movement.
- Lower your body by bending your front knee and hip.
- Push through your front foot to return to standing.
- Complete the prescribed repetitions before switching legs.
Training tips:
- Maintain stable front-foot contact.
- Allow your front knee to move naturally.
- Avoid bouncing at the bottom.
- Use dumbbells only when you can maintain balance.
- Keep approximately 1–2 repetitions in reserve.
Rest 90–120 seconds between sets, allowing enough recovery after training both legs.
3. Seated Leg Extension: 3 × 12–15
The seated leg extension provides direct quadriceps training through knee extension.
It adds quadriceps volume without requiring substantial hip extension.
How to perform it:
- Adjust the seat so your knees align with the machine's pivot.
- Position the lower-leg pad comfortably above your ankles.
- Keep your back supported.
- Extend your knees to raise the resistance.
- Pause briefly near the top if comfortable.
- Lower the weight under control.
Training tips:
- Avoid swinging the resistance.
- Maintain stable hip positioning.
- Use a comfortable range of knee extension.
- Keep approximately 1–2 repetitions in reserve.
Rest 60–90 seconds between sets.
4. Seated Leg Curl: 3 × 10–15
The seated leg curl trains the hamstrings through knee flexion.
It complements the leg press and leg extension because those movements do not provide substantial dynamic hamstring training.
How to perform it:
- Adjust the seat and pads to fit your leg length.
- Position your knees near the machine's pivot.
- Secure your thighs beneath the restraint pad.
- Bend your knees to pull the lower-leg pad downward and backward.
- Maintain a stable seated position.
- Return the resistance gradually.
Training tips:
- Keep your hips supported.
- Avoid using momentum.
- Use a comfortable range of knee flexion.
- Maintain approximately 1–2 repetitions in reserve.
Rest 60–90 seconds between sets.
5. Standing Calf Raise: 3 × 10–15
The standing calf raise trains the plantar flexors, including the gastrocnemius and soleus.
It provides direct calf training after the main thigh exercises.
How to perform it:
- Position your feet securely on the platform.
- Keep your knees relatively straight without forcing hyperextension.
- Lower your heels through a comfortable range.
- Push through the balls of your feet to raise your heels.
- Pause briefly at the top.
- Lower gradually.
Training tips:
- Avoid bouncing.
- Maintain consistent ankle movement.
- Do not excessively bend your knees to generate momentum.
- Use a controlled range of motion.
- Maintain approximately 1–2 repetitions in reserve.
Rest 60–90 seconds between sets.
How to Warm Up Before This Quad-Focused Leg Workout
Spend approximately 5–8 minutes preparing for the session, followed by progressive warm-up sets on the seated leg press.
A practical warm-up includes:
- 3–5 minutes: Easy cycling or walking.
- 1–2 minutes: Comfortable knee, hip, and ankle movements.
- 2–3 warm-up sets: Gradually increase resistance on the seated leg press.
For example, if your planned working weight is 100 kg, you might perform:
- 40 kg × 12 repetitions.
- 60 kg × 8 repetitions.
- 80 kg × 4 repetitions.
These numbers are illustrative and should be adjusted to your strength and equipment.
Warm-up sets should prepare you for the movement without creating substantial fatigue.
Before Bulgarian split squats, one light practice set per leg may be useful if you need additional balance preparation.
How Hard Should You Train During This Leg Workout?
Use repetitions in reserve (RIR) to manage training effort.
RIR refers to the number of additional repetitions you could complete before reaching muscular failure.
For this workout:
- Seated leg press: Approximately 1–2 RIR.
- Bulgarian split squat: Approximately 1–2 RIR.
- Seated leg extension: Approximately 1–2 RIR.
- Seated leg curl: Approximately 1–2 RIR.
- Standing calf raise: Approximately 1–2 RIR.
You do not need to train every set to failure.
For the seated leg press and Bulgarian split squat, stop when you can no longer maintain the intended movement without substantial compensation.
For machine isolation exercises, training relatively close to muscular failure can be practical because the movements have lower whole-body stabilization demands.
However, technique should remain controlled throughout the set.
How to Progress This Seated Leg Press Workout Over Several Weeks
Progressive overload should involve gradually increasing repetitions or resistance while maintaining consistent exercise execution.
Step 1: Start Near the Lower End of Each Repetition Range
For the seated leg press, choose a resistance that allows approximately 10 controlled repetitions per set.
Maintain the same seat position, foot placement, and depth between workouts.
Step 2: Gradually Increase Repetitions
Keep the resistance consistent while increasing repetitions over time.
For example:
- Week 1: 3 × 10.
- Week 2: 3 × 11.
- Week 3: 3 × 12.
- Week 4: 3 × 13.
- Week 5: 3 × 15.
These numbers illustrate a possible progression rather than a guaranteed weekly improvement.
Step 3: Increase Resistance When You Reach the Upper Limit
Once you complete all working sets at the top of the repetition range with consistent technique, increase resistance by the smallest practical increment.
Return toward the lower end of the range and repeat the process.
Step 4: Apply the Same Method to Other Exercises
Progress Bulgarian split squats, leg extensions, leg curls, and calf raises using their prescribed repetition ranges.
Maintain controlled technique rather than increasing resistance at the expense of range of motion.
Step 5: Manage Accumulated Fatigue
If performance consistently declines or soreness interferes with your next training session, consider temporarily reducing working sets or resistance.
You do not need to increase the weight every workout.
Consistent training over several months matters more than forcing progression during every session.
How to Fit This Seated Leg Press Workout Into a 4–6-Day Training Split
This session works well as a quadriceps-focused lower-body day within a four-, five-, or six-day resistance training routine.
For a four-day upper/lower split, a practical arrangement is:
- Monday: Upper body.
- Tuesday: Lower body with quadriceps emphasis.
- Thursday: Upper body.
- Friday: Lower body with hamstring and glute emphasis.
For a five- or six-day routine, the workout can serve as one of your lower-body sessions.
If you train your legs twice per week, distribute total quadriceps and hamstring volume across both sessions rather than automatically repeating the same number of sets.
This workout includes nine direct working sets of quadriceps-focused exercises, three sets of leg curls, and three sets of calf raises.
Account for other squats, lunges, hip hinges, and lower-body exercises when planning the rest of your training week.
Seated Leg Press: Muscles Worked, Benefits, and Proper Form
The seated leg press is a compound lower-body exercise performed on a machine that allows you to push a weighted platform away from your body by extending your knees and hips. It primarily trains the quadriceps, gluteus maximus, and adductor magnus, with additional contributions from other lower-body muscles.
Unlike barbell squats, the seated leg press supports your torso and does not require you to balance a barbell. This makes it useful for training your legs with challenging resistance while reducing the coordination and balance demands of free-weight exercises.
The seated leg press is effective for building lower-body muscle and strength when performed through a comfortable range of motion with sufficient training effort. However, the movement path, resistance, and range of motion vary between machine designs.
Some seated leg press machines use a horizontal sled, while others use a seated lever or cable-driven mechanism. The general technique principles remain similar, but you should adjust the machine to your body proportions rather than forcing one position on every model.
What Muscles Does the Seated Leg Press Work?
The seated leg press primarily trains the quadriceps, gluteus maximus, and adductor magnus through knee and hip extension. The relative contribution of these muscles depends on knee bend, hip position, foot placement, machine geometry, and individual anatomy.
Quadriceps: The Main Knee Extensors
The quadriceps are the large muscles at the front of your thighs. They consist of four muscles:
- Rectus femoris: Crosses both the hip and knee joints.
- Vastus lateralis: Located along the outer portion of the thigh.
- Vastus medialis: Located along the inner portion of the thigh.
- Vastus intermedius: Located beneath the rectus femoris.
The quadriceps extend your knees as you push the platform away.
The three vastus muscles are major contributors to knee extension during the leg press. The rectus femoris also contributes, although its role is influenced by the simultaneous movement of the hip and knee.
Because the leg press allows substantial knee flexion and extension, it can provide a strong hypertrophy stimulus for the quadriceps.
Gluteus Maximus: Hip Extension
The gluteus maximus is the largest muscle of the buttocks and contributes to hip extension.
During the seated leg press, it helps extend your hips as you push the platform away from your torso.
Its contribution is influenced by the amount of hip flexion, the machine's movement path, and your foot placement.
Deeper comfortable hip flexion can increase the movement demands placed on the hip extensors, but you should not force additional depth by allowing your pelvis to roll excessively off the backrest.
Adductor Magnus: An Important Hip Extensor
The adductor magnus is a large muscle along the inner thigh.
Its posterior portion contributes substantially to hip extension, especially when the hip begins in a flexed position.
This means the seated leg press trains more than the quadriceps and glutes.
However, the exercise does not isolate the inner thighs, and changing your stance does not guarantee selective growth of one adductor region.
Hamstrings: Limited Dynamic Contribution
The hamstrings cross the hip and knee joints, with the exception of the short head of the biceps femoris.
Most hamstring muscles can contribute to hip extension, but they also produce knee flexion.
Because the seated leg press simultaneously extends the hips and knees, it does not train the hamstrings through the same dynamic action as Romanian deadlifts or leg curls.
The hamstrings may contribute to joint control and stabilization, but they should not be considered a primary target of the exercise.
For complete hamstring development, include a hip-hinge movement, a leg curl, or both.
Calves and Lower-Leg Stabilizers
The gastrocnemius and soleus help control the ankle and maintain stable contact with the platform.
They are not the main muscles responsible for pushing the resistance during a standard seated leg press.
A dedicated calf raise variation on a suitable leg press machine can train the calves more directly, but it is a different movement.
Core and Pelvic Stabilizers
The machine supports your torso, reducing the stabilization demands compared with free-weight squats.
Your abdominal muscles and other trunk stabilizers still contribute to maintaining a controlled position against the seat.
Their role is primarily stabilization rather than producing the pressing movement.
Is the Seated Leg Press Effective for Building Bigger Legs?
Yes. The seated leg press is effective for lower-body hypertrophy because it allows you to train the quadriceps and hip extensors against progressively increasing resistance.
The machine provides external support, making it easier to focus on producing force through your legs rather than balancing your body.
This can be particularly useful when your goal is to accumulate challenging quadriceps training volume.
Why the Seated Leg Press Works for Quadriceps Growth
The quadriceps produce knee extension as you push the platform away.
When you use sufficient resistance and a meaningful range of knee motion, the exercise challenges the quadriceps repeatedly throughout each set.
For muscle growth, important factors include:
- Appropriate resistance.
- Sufficient training effort.
- Consistent range of motion.
- Adequate working sets.
- Progressive overload.
- Recovery between sessions.
The seated leg press is one way to provide this stimulus, but it is not the only effective quadriceps exercise.
Can the Seated Leg Press Build Your Glutes?
Yes. The gluteus maximus contributes to hip extension during the leg press.
The amount of hip motion and the resistance encountered through that motion influence the training stimulus.
A comfortable, substantial range of hip flexion can provide meaningful glute involvement.
However, seated leg presses do not replace every glute exercise. Hip thrusts, split squats, and Romanian deadlifts can challenge the glutes through different joint positions and movement patterns.
Is the Seated Leg Press Better for Beginners Than Squats?
The seated leg press can be easier for beginners to learn because the machine supports the torso and reduces balance requirements.
You can concentrate on controlling knee and hip movement without coordinating a barbell.
However, beginners can also learn squats effectively with appropriate instruction and resistance.
The leg press is an alternative or complement, not a mandatory prerequisite for squatting.
What Are the Limitations of the Seated Leg Press?
The seated leg press does not train unsupported balance, trunk stabilization, or free-weight squat technique to the same extent as squats.
Machine designs also differ substantially in leverage and resistance.
A weight displayed on one leg press machine may not feel equivalent to the same weight on another machine.
For these reasons, track progression on the same machine whenever possible.
Main Benefits of the Seated Leg Press
Building Quadriceps Muscle With External Support
The seated leg press allows you to train knee extension against challenging resistance while your torso remains supported.
This makes it useful when you want additional quadriceps volume without the balance demands of lunges or free-weight squats.
Training the Glutes and Hip Extensors
The exercise also requires hip extension, allowing the gluteus maximus and adductor magnus to contribute.
This makes the leg press a compound movement rather than a quadriceps isolation exercise.
Reducing Balance and Coordination Demands
Because you remain seated against a backrest, the exercise requires less balance than standing lower-body movements.
This can help you focus on leg effort and consistent repetitions.
Adjusting Resistance Easily
Many seated leg press machines use a selectorized weight stack.
You can increase or decrease resistance without loading individual plates.
This makes the exercise convenient for warm-up sets, progressive overload, and higher-repetition training.
Adding Lower-Body Volume Without Heavy Axial Loading
The seated leg press does not require a barbell resting across your upper back.
Although substantial forces still act through your hips and spine, the external support changes the loading demands compared with barbell squats.
This can be useful when you want additional leg work after demanding compound exercises.
Training One Leg at a Time
Some seated leg press machines allow controlled unilateral repetitions.
Single-leg pressing can help you train each side independently and identify differences in strength or movement control.
However, not every machine is suitable for single-leg use, so follow its intended design.
How to Set Up the Seated Leg Press Machine Correctly
Proper setup determines your starting hip and knee angles, foot contact, and available range of motion.
The correct position depends on your height, limb proportions, mobility, and machine design.
Step 1: Adjust the Seat Position
Sit with your back and pelvis supported.
Adjust the seat distance so your knees can bend comfortably without forcing your thighs excessively into your abdomen.
You should be able to reach a meaningful starting depth while maintaining contact with the backrest.
If the seat is too close to the platform, your hips may flex beyond your comfortable range.
If it is too far away, you may lose useful knee flexion and shorten the exercise.
Step 2: Position Your Feet on the Platform
Place your feet approximately shoulder-width apart as a starting point.
Keep your feet flat against the platform, with your toes pointing slightly outward if comfortable.
Your exact stance should accommodate your hip structure and natural knee movement.
Avoid placing your feet so low that your heels lift or so high that you cannot achieve a useful range of knee motion.
Step 3: Align Your Knees With Your Feet
Your knees should generally travel in the same direction as your toes.
They do not need to remain perfectly vertical or follow one rigid path.
Allow natural knee movement while avoiding excessive inward collapse that you cannot control.
Step 4: Keep Your Back and Pelvis Supported
Maintain contact between your torso and the backrest.
Your pelvis should remain reasonably stable throughout the repetition.
Do not force additional depth by allowing your lower back to round substantially or your hips to lift away from the seat.
Step 5: Check the Starting Range of Motion
Begin with light resistance and lower the platform into a comfortable position.
Check that:
- Your feet remain flat.
- Your knees move comfortably.
- Your pelvis stays supported.
- You can extend your legs without forcing a hard lockout.
- You can control the return.
Adjust the seat or foot placement if necessary.
Step 6: Select an Appropriate Weight
Choose a resistance that allows controlled repetitions through your intended range.
Do not select the load based on how much weight another person uses.
Machine leverage and resistance can vary considerably.
How to Perform the Seated Leg Press Step by Step
Step 1: Establish the Starting Position
Sit against the backrest with your feet securely positioned on the platform.
Keep your knees bent within a comfortable range.
Hold the machine's handles if available.
Brace your torso lightly and prepare to push through your feet.
Step 2: Push the Platform Away
Extend your knees and hips together to move the platform away from your torso.
Maintain full-foot contact rather than shifting all pressure onto your toes.
Allow your knees to track naturally in the direction of your feet.
Step 3: Continue Through a Controlled Pressing Motion
Push smoothly without bouncing or jerking the resistance.
Keep your pelvis and back supported.
Avoid changing your foot position during the repetition.
Step 4: Finish Without Forcing Knee Lockout
Extend your legs to a comfortable finishing position.
Your knees may approach full extension, but you should not force them backward into hyperextension.
Maintain control rather than allowing the machine to rest abruptly against its mechanical stops.
Step 5: Lower the Platform Gradually
Bend your knees and hips to return the platform toward your body.
Control the resistance throughout the lowering phase.
Keep your heels in contact with the platform and your pelvis supported.
Step 6: Stop at Your Comfortable Bottom Position
Lower until you reach the deepest position you can control without excessive pelvic movement or joint discomfort.
The exact depth will vary between individuals and machines.
Do not bounce at the bottom.
Step 7: Repeat With Consistent Technique
Perform each repetition through approximately the same range of motion.
Maintain stable foot placement and controlled movement.
End the set when you can no longer complete the intended repetitions without substantial technique changes.
How Should You Breathe During the Seated Leg Press?
Inhale during the lowering phase and exhale as you press the platform away.
Maintain enough abdominal tension to keep your torso stable against the seat.
During heavier sets, a brief brace can help maintain control.
Avoid prolonged breath-holding when it is unnecessary, particularly during moderate- and higher-repetition sets.
How Deep Should You Go on the Seated Leg Press?
Use the deepest comfortable range of motion that allows your feet to remain supported and your pelvis to stay reasonably stable against the backrest.
Greater knee and hip flexion can increase the movement demands placed on the quadriceps and hip extensors.
However, deeper is not automatically better if it requires substantial compensation or causes discomfort.
Should Your Knees Reach Your Chest?
Your knees do not need to touch your chest.
The appropriate bottom position depends on your limb proportions, hip mobility, and the machine's design.
Stop before your pelvis rolls excessively or your lower back loses its supported position.
Is a 90-Degree Knee Angle Necessary?
No. A 90-degree knee angle is not a universal requirement.
Some people can comfortably use greater knee flexion, while others may need a smaller range.
The goal is to use a controlled, repeatable movement that challenges the intended muscles.
Is It Okay for Your Knees to Travel Forward?
Yes. Knee flexion naturally changes the position of the knees relative to the feet.
You do not need to prevent the knees from moving forward.
Maintain stable foot contact and a comfortable knee path.
Should You Fully Straighten Your Legs?
You can approach full knee extension if the movement remains controlled and comfortable.
Avoid forcefully snapping your knees backward or relying on the machine's end stop.
Continuous muscular control is more important than avoiding every degree of knee extension.
What Is the Best Tempo for Seated Leg Presses?
A controlled tempo is appropriate for most seated leg press sets.
A practical starting point is:
- Pressing phase: Approximately 1–2 seconds.
- Top position: Brief controlled transition.
- Lowering phase: Approximately 2–3 seconds.
These timings are guidelines rather than strict requirements.
Avoid dropping the platform rapidly or bouncing out of the bottom position.
Extremely slow repetitions are not necessary for hypertrophy.
Seated Leg Press Foot Placement: High vs. Low, Wide vs. Narrow
Foot placement changes joint angles and may influence how much the quadriceps and hip extensors contribute.
However, these differences depend on machine geometry and individual anatomy.
No foot position completely isolates one lower-body muscle.
Standard Foot Placement
Place your feet approximately shoulder-width apart near the middle of the platform.
This is a practical starting position for balanced knee and hip movement.
Adjust your stance based on comfort and control.
High Foot Placement
Placing your feet higher on the platform may change the relative knee and hip motion.
On some machines, it can encourage a movement pattern with greater hip-extensor involvement.
However, the effect is not identical across machines.
Do not place your feet so high that you lose stable contact or substantially shorten the movement.
Low Foot Placement
A lower foot position may increase knee flexion demands on some machines.
This can make the exercise feel more quadriceps-focused.
However, placing your feet too low may cause your heels to lift or create an uncomfortable ankle position.
Use a position that allows full-foot contact.
Wide Foot Placement
A wider stance changes hip positioning and may feel more comfortable for some individuals.
It can alter the contribution of the hip adductors and other hip muscles.
However, a wide stance does not guarantee isolated inner-thigh development.
Narrow Foot Placement
A narrower stance changes hip and knee alignment and may feel natural for some lifters.
It does not automatically isolate the outer quadriceps.
Choose a width that allows your knees to track comfortably.
Toes Pointed Outward
A slight outward toe angle is common and can accommodate natural hip positioning.
Your knees should generally move in the same direction as your toes.
Avoid forcing an exaggerated angle that feels uncomfortable.
Common Seated Leg Press Mistakes and How to Fix Them
Using Too Much Weight
Problem: Excessive resistance can cause shortened repetitions, uncontrolled lowering, and excessive movement against the backrest.
Correction: Reduce the load until you can use a substantial comfortable range of motion with consistent control.
Lifting Your Hips Off the Seat
Problem: Allowing your pelvis to lift can change your spinal position and reduce stability.
Correction: Adjust the seat or limit the bottom range so your pelvis remains supported.
Rounding Your Lower Back Excessively
Problem: Excessive pelvic rolling at the bottom can create an uncomfortable position under resistance.
Correction: Stop the lowering phase before your pelvis begins to move substantially away from its supported position.
Letting Your Heels Lift
Problem: Losing heel contact can reduce foot stability and alter the way force is transferred into the platform.
Correction: Adjust foot placement or reduce depth until you can maintain comfortable full-foot contact.
Allowing Uncontrolled Knee Collapse
Problem: Excessive inward knee movement may reduce consistency and create discomfort.
Correction: Use a manageable load and allow your knees to follow the general direction of your toes.
Locking the Knees Aggressively
Problem: Forcefully snapping into end-range extension can reduce control.
Correction: Finish the press smoothly without forcing hyperextension.
Bouncing at the Bottom
Problem: Rapidly reversing the platform can introduce momentum and make the movement harder to control.
Correction: Lower gradually and transition into the pressing phase without bouncing.
Performing Very Short Repetitions
Problem: Excessively short repetitions may limit the amount of muscular work performed through the available movement.
Correction: Use a meaningful comfortable range rather than prioritizing heavier resistance.
Moving Your Feet During the Set
Problem: Changing foot position while the platform is loaded can reduce stability.
Correction: Establish your stance before beginning and maintain it throughout the set.
Comparing Weight Across Different Machines
Problem: Leg press machines use different leverage systems and resistance mechanisms.
Correction: Track your performance on the same machine instead of treating displayed weight as directly comparable across equipment.
Seated Leg Press Variations for Beginners and Advanced Lifters
Beginner: Light Seated Leg Press
Begin with a manageable resistance and a comfortable range of motion.
Perform approximately 2–3 sets of 10–15 repetitions.
Focus on keeping your feet stable, knees tracking naturally, and pelvis supported.
Intermediate: Standard Seated Leg Press
Use a challenging resistance while maintaining consistent technique.
Perform approximately 3 sets of 8–12 repetitions.
Gradually increase repetitions before increasing the weight.
Intermediate: Single-Leg Seated Leg Press
Some machines allow you to press with one leg at a time.
This can help train each side independently.
Use lighter resistance and keep your pelvis stable.
Only use this variation when the machine is designed to accommodate unilateral pressing safely.
Intermediate: Paused Seated Leg Press
Pause briefly at the bottom of the movement before pressing upward.
This can reduce reliance on bouncing and improve consistency.
Use a lighter resistance if necessary.
Advanced: Controlled-Eccentric Leg Press
Lower the platform over approximately three to four seconds.
This variation increases the time spent controlling the lowering phase.
It is optional and not inherently superior to standard repetitions for muscle growth.
Advanced: Leg Press Drop Sets
Perform a challenging set, reduce the resistance, and continue with additional controlled repetitions.
For example, complete 10–12 repetitions, reduce the resistance by approximately 20%, and perform another 6–10 repetitions.
Drop sets can increase local fatigue and training density.
Use them selectively rather than adding them to every workout.
Advanced: Rest-Pause Leg Press
Complete a challenging set, rest approximately 15–20 seconds, and perform several additional repetitions.
Maintain stable foot placement and controlled depth.
Avoid using rest-pause methods when fatigue prevents you from controlling the platform.
Best Seated Leg Press Alternatives
The closest alternatives train knee and hip extension through compound lower-body movements.
Some require greater balance and stabilization, while others provide similar external support.
45-Degree Leg Press
Equipment: 45-degree sled leg press.
This exercise trains the quadriceps, glutes, and adductor magnus through knee and hip extension.
The inclined sled changes the resistance mechanics compared with a horizontal seated leg press.
It is a practical alternative when a seated machine is unavailable.
Hack Squat Machine
Equipment: Hack squat machine.
The hack squat trains the quadriceps and hip extensors through a guided squat movement.
It typically places your torso in a more upright position than many seated leg press machines.
It can be useful when you want substantial quadriceps training with machine support.
Smith Machine Squat
Equipment: Smith machine.
The Smith machine squat trains the quadriceps, glutes, and adductor magnus through knee and hip extension.
The bar follows a guided path, but you must still support and position your body.
It is useful when you want a standing squat variation with a constrained bar path.
Barbell Back Squat
Equipment: Barbell and squat rack.
The back squat trains the quadriceps and hip extensors while requiring greater trunk stabilization and balance.
It is useful for developing free-weight squatting strength.
However, it places different demands on the body than a seated leg press.
Dumbbell Goblet Squat
Equipment: Dumbbell or kettlebell.
Hold the weight in front of your torso and perform a controlled squat.
This compound movement trains the quadriceps and hip extensors.
It is a practical alternative for home gyms or when heavy machines are unavailable.
Bulgarian Split Squat
Equipment: Bench and optional dumbbells.
Place your rear foot on a bench and lower your body using the front leg.
This unilateral exercise trains the quadriceps and glutes while requiring more balance than the leg press.
It is useful when you want independent leg training.
Bodyweight Squat
Equipment: None.
Perform a squat using your body weight as resistance.
This trains the quadriceps and hip extensors through knee and hip extension.
It is accessible for beginners, although advanced lifters may need additional resistance for substantial hypertrophy.
Step-Up
Equipment: Stable step or bench and optional dumbbells.
Step onto an elevated surface and extend the supporting knee and hip.
This compound movement trains the quadriceps and glutes.
It also requires more balance and coordination than the seated leg press.
Leg Extension Machine
Equipment: Seated leg extension machine.
The leg extension isolates knee extension and primarily trains the quadriceps.
It does not reproduce the hip extension component of the leg press.
However, it is useful when you want additional direct quadriceps training without substantial glute involvement.
Seated Leg Press vs. Squat: Which Is Better for Leg Growth?
Both seated leg presses and squats can build lower-body muscle effectively.
The main differences involve stabilization, movement mechanics, and training specificity.
Advantages of the Seated Leg Press
- External torso support.
- Reduced balance requirements.
- Convenient resistance adjustments.
- Straightforward repetition tracking.
- Useful for additional quadriceps volume.
- Less need to coordinate a loaded barbell.
Advantages of Squats
- Greater trunk stabilization demands.
- Development of unsupported lower-body strength.
- More practice coordinating whole-body movement.
- Direct relevance to free-weight squatting performance.
- Greater equipment flexibility with dumbbell and bodyweight variations.
Which Exercise Builds More Quadriceps Muscle?
Neither exercise is universally superior for quadriceps hypertrophy.
Both can provide substantial knee-extension loading when performed through appropriate ranges with sufficient effort.
The best choice depends on your training goals, comfort, equipment, and ability to progress.
Combining them can be useful, but it is not mandatory.
Seated Leg Press vs. Hack Squat: What Is the Difference?
Both exercises train the quadriceps and hip extensors through guided lower-body movements.
The seated leg press supports your torso in a seated position while you push a platform away.
The hack squat generally places you in a standing or semi-standing position against a supported sled.
The two machines differ in hip position, torso angle, and resistance mechanics.
Choose the variation that allows comfortable joint movement, consistent depth, and progressive resistance.
Seated Leg Press vs. Leg Extension: Which Is Better for Quads?
Both exercises train the quadriceps, but they use different movement patterns.
The seated leg press is a compound exercise involving knee and hip extension.
The leg extension is an isolation exercise involving knee extension.
When to Choose the Seated Leg Press
Choose the leg press when you want to train the quadriceps alongside the glutes and adductor magnus.
It is useful as a primary lower-body movement or as additional volume after squats.
When to Choose the Leg Extension
Choose the leg extension when you want more direct quadriceps work without requiring substantial hip extension.
It can be particularly useful near the end of a leg workout.
Should You Include Both?
Including both can provide different loading conditions for the quadriceps.
For example, you might perform three sets of seated leg presses followed by two sets of leg extensions.
However, the appropriate amount depends on your existing training volume and recovery.
How Many Sets and Reps of Seated Leg Presses Should You Do?
The seated leg press can be used for muscle growth, strength development, and muscular endurance.
The most appropriate repetition range depends on your goals and ability to maintain controlled movement.
For Leg Hypertrophy
- Working sets: 2–4.
- Repetitions: 8–15.
- Rest: 2–3 minutes.
- Effort: Approximately 1–3 repetitions in reserve.
Moderate-repetition sets are a practical starting point for building the quadriceps and glutes.
Higher or lower repetition ranges can also produce hypertrophy when performed with sufficient effort.
For Lower-Body Strength
- Working sets: 3–5.
- Repetitions: 5–8.
- Rest: 2–3 minutes.
- Effort: Challenging resistance without losing control.
The seated leg press can improve strength in the movement.
However, strength gains are partly specific to the machine and do not automatically translate into equivalent improvements in barbell squat performance.
For Muscular Endurance
- Working sets: 2–3.
- Repetitions: 15–25.
- Rest: 60–120 seconds.
- Effort: Maintain consistent technique as fatigue increases.
Higher-repetition sets can create substantial local fatigue.
Use a resistance that allows you to maintain stable foot contact and controlled depth.
Should You Do the Seated Leg Press Before or After Squats?
Exercise order should reflect your primary training goal.
Performing an exercise earlier generally allows you to complete more repetitions or use greater resistance before fatigue accumulates.
Leg Press First for Quadriceps Hypertrophy
Start with the seated leg press when it is your primary quadriceps exercise.
This can be useful when you prefer machine-supported training or want to prioritize leg press progression.
Squats First for Free-Weight Strength
Start with squats when improving barbell squat strength or technique is your priority.
The seated leg press can follow as additional lower-body volume.
Leg Press After Romanian Deadlifts
The seated leg press can also follow Romanian deadlifts in a lower-body session.
This arrangement allows you to train the hip-hinge movement first and then perform a supported knee-dominant exercise.
However, fatigue from earlier movements may reduce your leg press performance.
How to Progress on the Seated Leg Press
Progressive overload involves gradually increasing the training challenge while maintaining consistent technique.
A double-progression method is practical for the seated leg press.
Step 1: Choose a Repetition Range
Suppose your goal is three sets of 10–15 repetitions.
Select a resistance that allows approximately 10 controlled repetitions per set while leaving 1–3 repetitions in reserve.
Step 2: Gradually Add Repetitions
Maintain the same resistance while increasing repetitions over several workouts.
For example:
- Week 1: 80 kg × 10, 10, 10.
- Week 2: 80 kg × 12, 11, 10.
- Week 3: 80 kg × 13, 12, 12.
- Week 4: 80 kg × 15, 14, 13.
- Week 5: 80 kg × 15, 15, 15.
These numbers illustrate the progression method rather than predicting guaranteed weekly improvements.
Step 3: Increase Resistance
Once you complete all working sets at the upper end of the repetition range with consistent technique, increase resistance by the smallest practical increment.
For example, move from 80 kg to 85 kg if the machine allows it.
Return toward the lower end of the repetition range and repeat the process.
Step 4: Maintain the Weight When Technique Changes
Do not increase resistance if you need to:
- Shorten your range of motion substantially.
- Lift your pelvis off the seat.
- Bounce at the bottom.
- Lose heel contact.
- Force knee extension.
- Allow the platform to return uncontrollably.
Consistent technique makes performance tracking more meaningful.
Step 5: Adjust Training Volume When Necessary
Count seated leg presses alongside squats, hack squats, lunges, split squats, and leg extensions when evaluating quadriceps training volume.
These exercises overlap in muscular demands.
If you are progressing and recovering well, adding more sets may not be necessary.
Increase training volume gradually when your current workload is insufficient.
Practical Coaching Tips for Better Seated Leg Presses
Keep Your Whole Foot Supported
Maintain stable contact through your heels and forefeet.
Avoid shifting entirely onto your toes.
This helps maintain consistent force transfer into the platform.
Adjust the Seat Before Increasing Weight
Seat position influences your starting knee and hip angles.
A small adjustment can improve comfort and usable range of motion.
Do not compensate for poor setup by adding resistance.
Use a Repeatable Depth
Choose a bottom position that allows your pelvis to remain supported.
Use approximately the same depth on every repetition.
This makes performance comparisons more reliable.
Avoid Chasing the Highest Weight Stack Number
Displayed resistance varies between machines.
Focus on controlled repetitions and progression on the same equipment.
A heavier number does not automatically indicate a better training stimulus.
Keep Your Knees Moving Naturally
Allow your knees to follow the general direction of your toes.
Do not force an excessively narrow or wide knee path.
Use a stance that accommodates your anatomy.
Recognize When Your Range of Motion Changes
As fatigue increases, you may begin performing shorter repetitions.
If this happens, reduce the resistance or end the set.
Do not count substantially shortened repetitions as equivalent to your normal working repetitions.
Seated Leg Press Precautions and Limitations
The seated leg press should produce muscular effort in your thighs and hips without sharp joint pain.
Some fatigue and muscular burning are normal during challenging sets.
Sharp knee, hip, ankle, or lower-back pain is a reason to stop and reassess.
If discomfort occurs, consider:
- Reducing resistance.
- Adjusting seat distance.
- Changing foot placement.
- Using a smaller comfortable range of motion.
- Slowing the lowering phase.
- Trying another leg press machine or squat variation.
Avoid forcing excessive depth when your pelvis begins to lift away from the backrest.
Use the machine's safety mechanisms according to its instructions, and keep your hands away from moving parts.
Persistent or worsening pain should be evaluated by an appropriate healthcare professional rather than trained through.

More Exercises
All Exercises









Everything You Need for a Fitter Body is here in GetFIT App!
Set calorie and macro goals, track your meals and activity, follow structured workout and meal plans, and monitor your progress over time. GetFIT App brings nutrition tracking, fitness planning, and everyday tools together in one simple membership.
High-Protein Recipes & Meal Plans
Discover hundreds of high-protein recipes, ready-made 4 week meal plans, and healthy meal ideas for weight loss and muscle building. Every recipe includes clear calorie and macro information, so eating for your goals is simple.


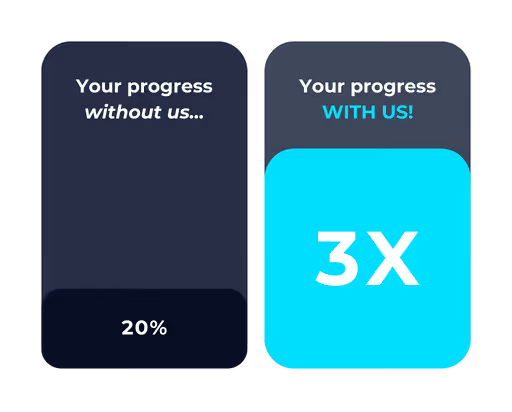
Join Thousands of GetFIT App Users Worldwide
Thousands of people around the world have already joined GetFIT App to track their nutrition, follow workout programs, and work toward their fitness goals. Join our growing global community and get the tools you need to manage your fitness journey in one place.

Try GetFIT App for 5 days free!
Discover the premium features of the GetFIT App during a free trial: personalized calorie calculation and tracking, meal plans, recipes, workout programs, e-books, and much more. Start your transformation today!

Dear User! Unlock your Dream Body Today!
Start your free trial today! With your premium membership, you’ll get immediate access to all the tools and content that help you lose weight, build muscle, and develop a healthy lifestyle.